Upgrading the bios on an x220 from Linux
This is something I don't do often. I did it once before. That thinkpad no longer runs. This (new to me) thinkpad had an ancient BIOS. I refuse to go through the anguish that is installing windows just to upgrade the bios. Luckily, lenovo provides bootable CD images that make it easy to upgrade the bios. Unluckily, I'm unaware of any x220 with a CD drive. Converting the iso to a bootable disk USB is simple enough.
1. Get firmware
There are other firmwares for other models. I'm sure the process is almost identical.
$ wget https://download.lenovo.com/pccbbs/mobiles/8duj31us.iso
2. Convert nonsense formats to something that works on a bootable USB
substitute sdx for the appropriate drive. Don't flash your hard drive. Use fdisk -l or lsblk to find the right one.
$ sudo pkg install geteltorito
$ geteltorito -o x220bios.img 8duj32us.iso
$ sudo umount /dev/sdx*
$ sudo dd if=./x220bios.img of=/dev/sdx
$ sudo eject /dev/sdx
3. Booting from the USB
insert the usb into the x220, reboot, mash the blue 'ThinkVantage' button, press 'F12', then use the arrow keys to select the "USB" option or something similar.
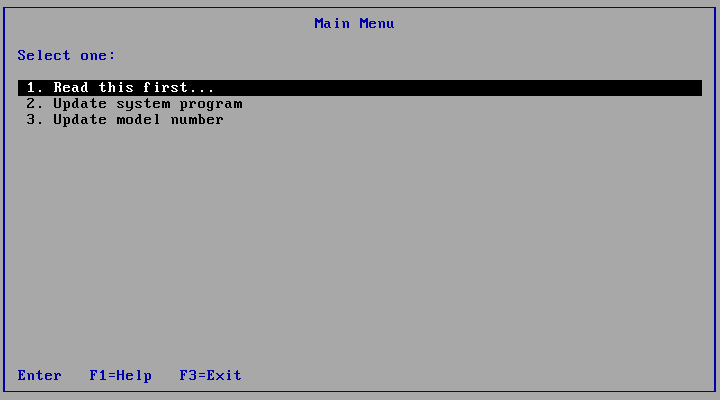
To proceed with the upgrade, select option 2 and follow the instructions. The system will power cycle a few times but eventually the upgrade will be complete. Once it's started, leave it be for a few minutes. You can safely remove the usb flash drive when the system boots back into your OS.
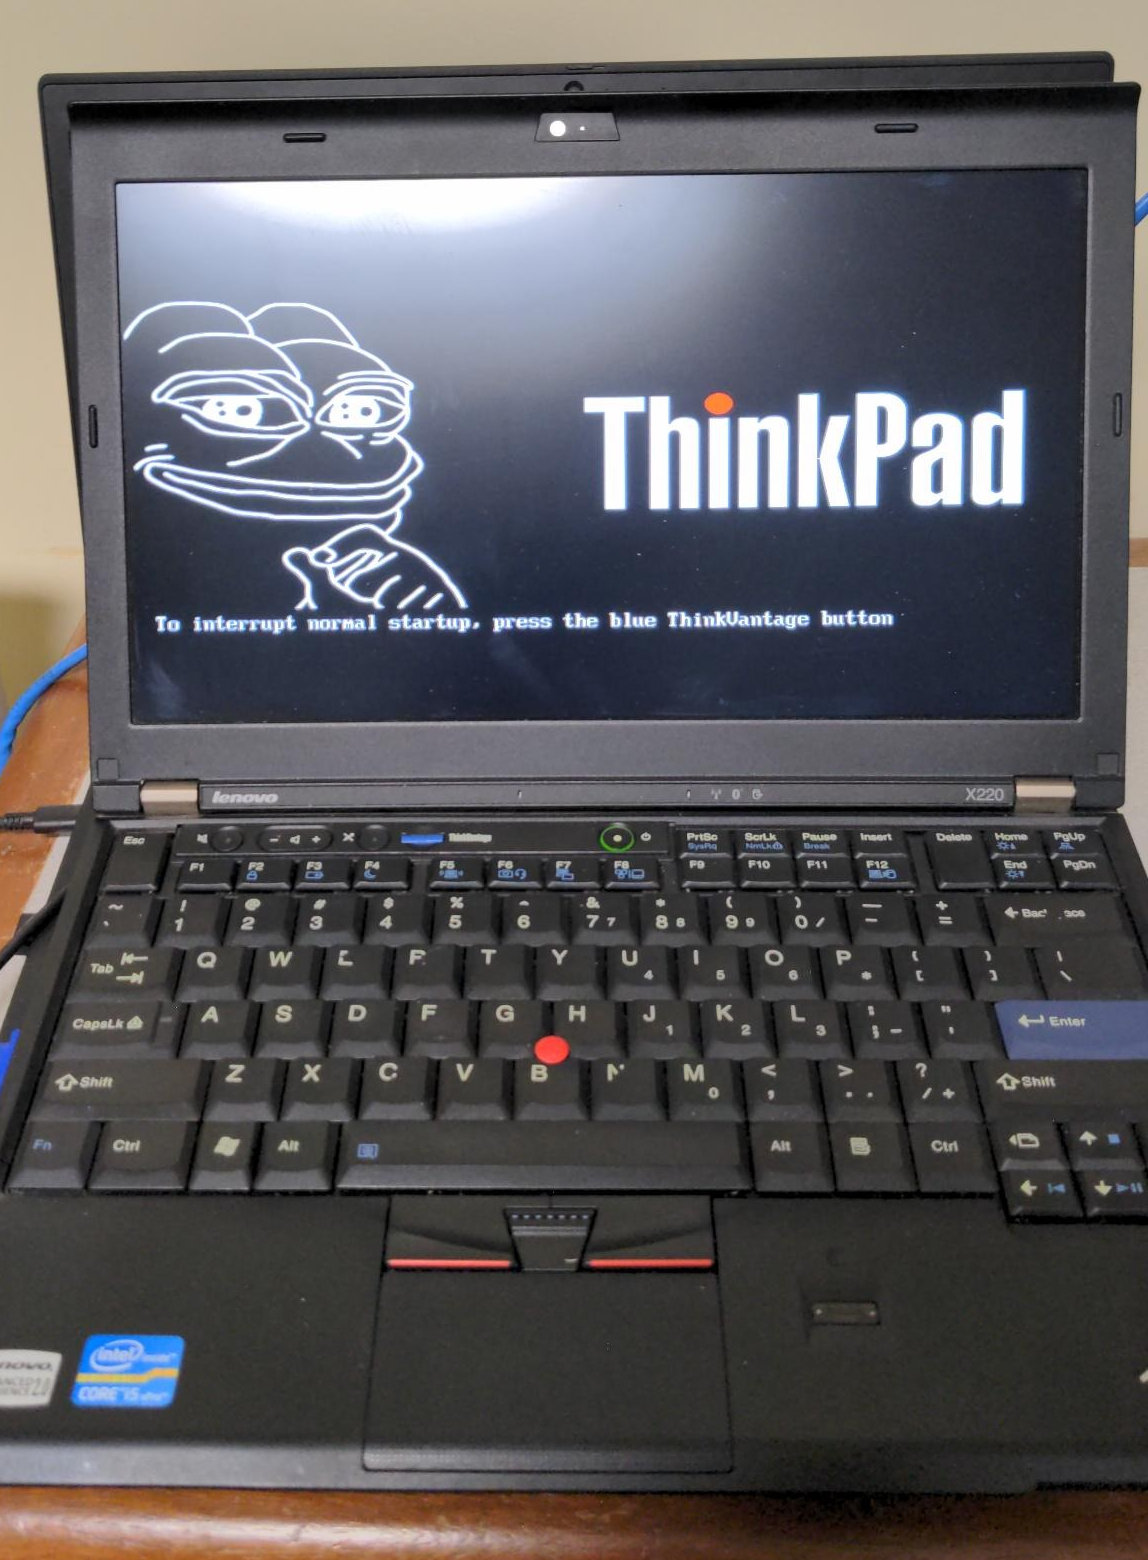
UPDATE: adding a custom bootsplash
You can replace the "Lenovo" logo with your own. This image must be encoded as a .BMP, .GIF, or .JPG, have a file size of 30K or less, and have a resolution of less than or equal to 640x480.
$ sudo su
# mount /dev/sdx1 /mnt
# cd /mnt/FLASH
# cat README.TXT | less
# cp /path/to/NEW_LOGO.GIF ./LOGO.GIF
And now we will modify the batch file, lcreflsh.bat. Make it look like this:
@echo off
flash2.exe /U /LOGO:LOGO.GIF
And now to unmount the drive and follow the instructions above flash the bios on the x220:
# umount /dev/sdx*
# eject /dev/sdx*
 Monero:
  Bitcoin:
  http://ilsstfnqt4vpykd2bqc7ntxf2tqupqzi6d5zmk767qtingw2vp2hawyd.onion:8080
 http://xzh77mcyknkkghfqpwgzosukbshxq3nwwe2cg3dtla7oqoaqknia.b32.i2p:9090
  |
|