Building a pirate box with streaming capabilities
Written for a friend who said “I need to bookmark your incoherent rambling because it’s very cool that what you just said is possible”
The goal of this project is to create a seedbox and a media streaming server at the same time. A seedbox is an always online machine (many people build them from raspberry pi boards) that downloads and seeds torrents. Seeding is important for torrent health. Using jellyfin, we can easily and automatically stream dubiously obtained media without any manual intervention whatsoever. All we need to do is add a torrent, wait a while, then, when it is complete, we can watch it via jellyfin.
I don’t need all this extra stuff because the entire problem of “streaming video and torrenting on a remote host” has been solved with ssh. This is my actual setup:
- torrent client and ssh server on one machine (the one with the most storage)
- use ssh and sshfs to access those files on another machine
mpv ~/remote/torrents/whatever.mp4on the “client” machines
For this article, I will be including code blocks that are significantly more verbose than usual. DNF output will be abridged where it is extremely long but full examples will be included. In the code blocks, the lines that start with a green 0x19@ or root@are shell commands that you can type and run. Additionally, in a few places certain things in the code blocks will be highlighted green. These are to show interactive input.
OS Install
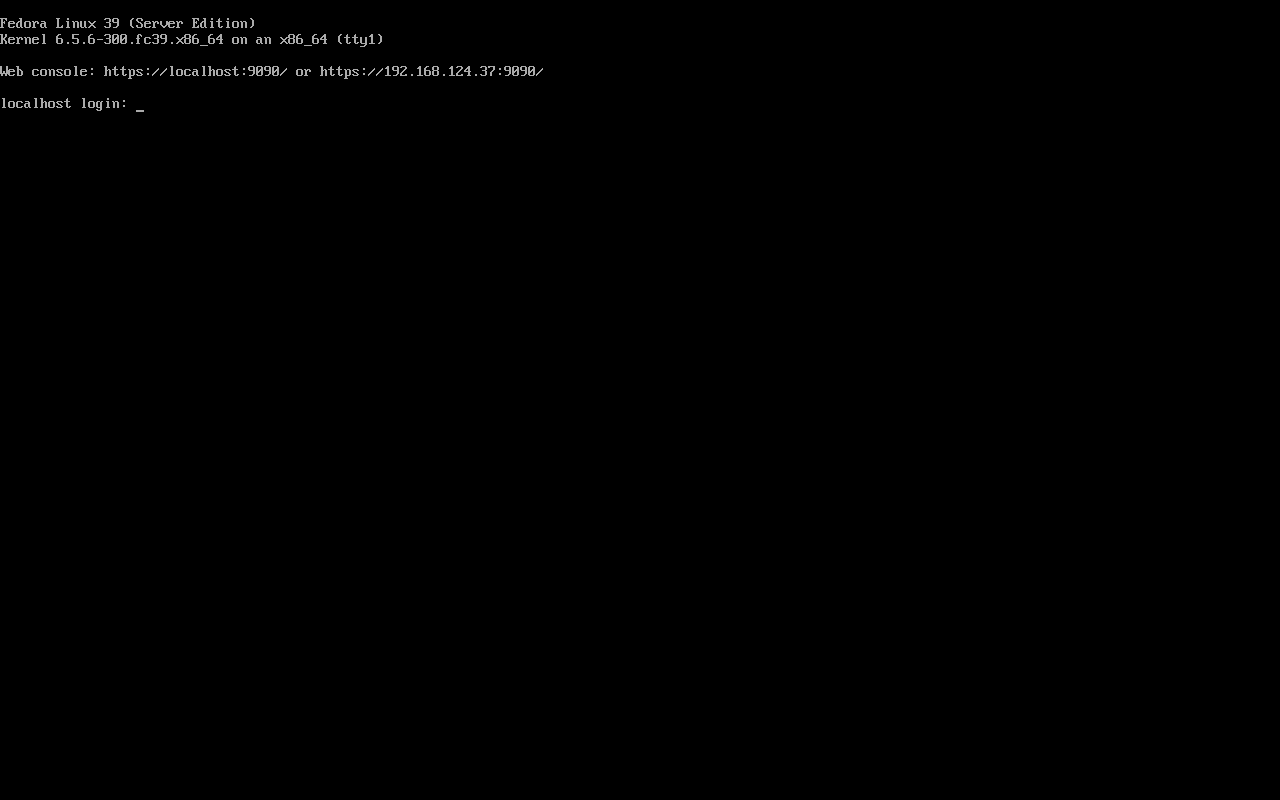
We will be using fedora server for this post because it’s familiar, “secure enough”, and easy to troubleshoot. If you do know what CPU architecture your computer has, you probably want the X86_64 iso image. I like the DVD install image because it comes with a lot of useful tools out of the box. If you do not know how to use the dd program you can use Fedora Mediawriter instead.
I will be doing this exercise in a virtual machine. The reader should use physical hardware that is capable of transcoding videos on the fly.
Refer to my fedora for new users guide if you have trouble getting the system to boot or confusion during installation. It is fairly self explanatory. The server installation menus will look similar but not identical. After the installation is complete and the system reboots, you will not get a fancy desktop environment. Because this is a server, we will not be needing these things (but, at a later date, if we want a desktop we can always install it).
Generally, I like to enable the root user but prohibit ssh password logins for root. Be sure to create a normal user and make sure the ‘administrative privileges’ box is checked. This will add your non-root user to the ‘wheel’ group. On most UNIX systems, this group is usually “the group that can do things as root”. For the profane, this is analogous to “you are allowed to Run as Administrator” on windows.
Eric S. Raymond’s jargon file tells us that the ‘wheel’ group got it’s name. It’s interesting UNIX lore that might be helpful to the new admin learning why components of UNIX have strange naming conventions.
Cockpit
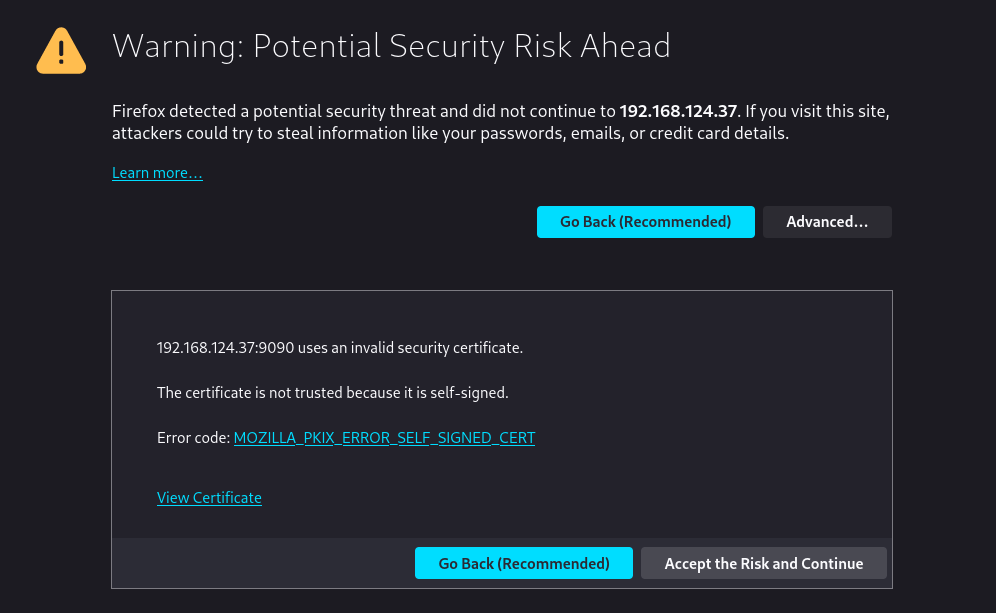
If you do not know how to use ssh, you can use Fedora’s cockpit. Cockpit is automatically installed and enabled on ‘server’ flavors of fedora. Shell commands can be entered verbatim into cockpit’s terminal tab. When you first boot the system you will see a line that says “Web console at” followed by an ip address and a port. Open http://$IP:9090 in the web browser on a separate machine.
You will see an SSL certificate error but this is fine. The cryptography is still good even if the certificate is self signed. You can safely accept the risk and continue
The next thing you will see is a login page for cockpit. Log in using the same username and password you set during installation. Click on the “Turn on Administrative Access” button and re-enter your password. This is the same as enabling sudo mode and will allow you to make modifications to the system using the cockpit web ui.

Standard post-install steps
We will begin by installing updates. Updates for always online servers is incredibly important, even if it’s behind a firewall. During the update process you will be prompted to type y or n in response to various Yes or No questions. Unless dnf says something about uninstalling a package, you can almost always safely type y then enter.
On Linux, password prompts in the terminal do not provide any feedback whatsoever when you are typing. Type the password, press enter. If it’s wrong you will be prompted again. If it’s correct the command will run.
[0x19@localhost ~]$ sudo dnf update -y

We trust you have received the usual lecture from the local System
Administrator. It usually boils down to these three things:

    #1) Respect the privacy of others.
    #2) Think before you type.
    #3) With great power comes great responsibility.

For security reasons, the password you type will not be visible.

[sudo] password for 0x19:

#[ very long dnf output is here, see the next block for a shorter example ]#

[0x19@localhost ~]$
After updating, we will add the RPM Fusion repository which provides packages that Red Hat does not ship. In our specific use case, RPM Fusion provides jellyfin and multimedia codecs.
[0x19@localhost ~]$ sudo dnf install https://mirrors.rpmfusion.org/free/fedora/rpmfusion-free-release-$(rpm -E %fedora).noarch.rpm https://mirrors.rpmfusion.org/nonfree/fedora/rpmfusion-nonfree-release-$(rpm -E %fedora).noarch.rpm
[sudo] password for 0x19:
Last metadata expiration check: 0:15:30 ago on Thu 11 Apr 2024 09:31:13 AM MDT.
rpmfusion-free-release-39.noarch.rpm                                                                                          9.2 kB/s |  11 kB     00:01
rpmfusion-nonfree-release-39.noarch.rpm                                                                                        19 kB/s |  11 kB     00:00
Dependencies resolved.
==============================================================================================================================================================
 Package                                            Architecture                    Version                       Repository                             Size
==============================================================================================================================================================
Installing:
 rpmfusion-free-release                             noarch                          39-1                          @commandline                           11 k
 rpmfusion-nonfree-release                          noarch                          39-1                          @commandline                           11 k

Transaction Summary
==============================================================================================================================================================
Install  2 Packages

Total size: 22 k
Installed size: 11 k
Is this ok [y/N]: y
Downloading Packages:
Running transaction check
Transaction check succeeded.
Running transaction test
Transaction test succeeded.
Running transaction
  Preparing        :                                                                                                                                      1/1
  Installing       : rpmfusion-nonfree-release-39-1.noarch                                                                                                1/2
  Installing       : rpmfusion-free-release-39-1.noarch                                                                                                   2/2
  Verifying        : rpmfusion-free-release-39-1.noarch                                                                                                   1/2
  Verifying        : rpmfusion-nonfree-release-39-1.noarch                                                                                                2/2

Installed:
  rpmfusion-free-release-39-1.noarch                                           rpmfusion-nonfree-release-39-1.noarch

Complete!
[0x19@localhost ~]$
After upgrading, we will set a hostname. Setting a unique and memorable hostname allows us to create a name=ip association in our router's DNS tab or in the /etc/hosts file of our UNIX systems. Now reboot. You will be disconnected from the server. Wait a few minutes and try to get back in.
[0x19@localhost ~]$ sudo hostnamectl set-hostname piratebox
[0x19@localhost ~]$ hostname
piratebox
[0x19@localhost ~]$ sudo reboot

Broadcast message from root@localhost on pts/1 (Thu 2024-04-11 09:49:19 MDT):

The system will reboot now!

[0x19@localhost ~]$ Connection to 192.168.124.81 closed by remote host.
Connection to 192.168.124.81 closed.
Installing components
We want two things to satisfy our goal: a torrent client and a media server. Transmission-daemon is the torrent client (there are others but I like transmission). Jellyfin is the media server (there are others but jellyfin is the most viable). Install these using dnf. The output has been shortened and modified. Dnf will pull in hundreds of dependencies.
0x19@piratebox:~$ sudo dnf install transmission-daemon jellyfin
[sudo] password for 0x19:
Last metadata expiration check: 0:03:20 ago on Thu 11 Apr 2024 09:48:46 AM MDT.
Dependencies resolved.
==============================================================================================================================================================
 Package                                  Architecture          Version                                           Repository                             Size
==============================================================================================================================================================
Installing:
 jellyfin                                 x86_64                10.8.13-1.fc39                                    rpmfusion-free-updates                9.4 k
 transmission-daemon                      x86_64                4.0.5-2.fc39                                      updates                               757 k

Transaction Summary
==============================================================================================================================================================
Install  2 Packages

Total download size: 248 M
Installed size: 871 M
Is this ok [y/N]:  y
Downloading Packages:
(1/2): transmission-daemon-4.0.5-2.fc39.x86_64.rpm                                                                        4.0 MB/s | 757 kB     00:00
(2/2): jellyfin-10.8.13-1.fc39.x86_64.rpm                                                                                  49 kB/s | 9.4 kB     00:00
--------------------------------------------------------------------------------------------------------------------------------------------------------------
Total                                                                                                                          10 MB/s | 248 MB     00:24
RPM Fusion for Fedora 39 - Free                                                                                               1.6 MB/s | 1.7 kB     00:00
Importing GPG key 0xD651FF2E:
 Userid     : "RPM Fusion free repository for Fedora (2020) "
 Fingerprint: E9A4 91A3 DE24 7814 E7E0 67EA E06F 8ECD D651 FF2E
 From       : /etc/pki/rpm-gpg/RPM-GPG-KEY-rpmfusion-free-fedora-39
Is this ok [y/N]: y
Key imported successfully
RPM Fusion for Fedora 39 - Nonfree                                                                                            1.6 MB/s | 1.7 kB     00:00
Importing GPG key 0x94843C65:
 Userid     : "RPM Fusion nonfree repository for Fedora (2020) "
 Fingerprint: 79BD B88F 9BBF 7391 0FD4 095B 6A2A F961 9484 3C65
 From       : /etc/pki/rpm-gpg/RPM-GPG-KEY-rpmfusion-nonfree-fedora-39
Is this ok [y/N]:  y
Key imported successfully
Running transaction check
Transaction check succeeded.
Running transaction test
Transaction test succeeded.
Running transaction
  Preparing        :                                                                                                                                  1/1
  Installing       : jellyfin-10.8.13-1.fc39.x86_64                                                                                                   1/2
  Running scriptlet: transmission-daemon-4.0.5-2.fc39.x86_64                                                                                          2/2
  Installing       : transmission-daemon-4.0.5-2.fc39.x86_64                                                                                          2/2
  Running scriptlet: transmission-daemon-4.0.5-2.fc39.x86_64                                                                                          2/2
  Running scriptlet: transmission-daemon-4.0.5-2.fc39.x86_64                                                                                          2/2
  Verifying        : transmission-daemon-4.0.5-2.fc39.x86_64                                                                                          1/2
  Verifying        : jellyfin-10.8.13-1.fc39.x86_64                                                                                                   2/2
Installed:
  jellyfin-10.8.13-1.fc39.x86_64                    transmission-daemon-4.0.5-2.fc39.x86_64

Complete!
0x19@piratebox:~$
Configuring services
Disable firewall temporarily
In order to make things easier for ourselves, we will disable the firewall while configuring the system. We will re-enable when we are done, adding the correct ports and services.
0x19@piratebox:~$ sudo systemctl stop firewalld
Transmission-daemon
We want to enable the service so it will automatically start on boot. We start the service to create an initial configuration file, then stop the service so it doesn’t nuke our custom config.
0x19@piratebox:~$ sudo systemctl enable transmission-daemon
Created symlink /etc/systemd/system/multi-user.target.wants/transmission-daemon.service → /usr/lib/systemd/system/transmission-daemon.service.
0x19@piratebox:~$ sudo systemctl start transmission-daemon
[sudo] password for 0x19:
0x19@piratebox:~$ sudo systemctl status transmission-daemon
● transmission-daemon.service - Transmission BitTorrent Daemon
     Loaded: loaded (/usr/lib/systemd/system/transmission-daemon.service; enabled; preset: disabled)
    Drop-In: /usr/lib/systemd/system/service.d
             └─10-timeout-abort.conf
     Active: active (running) since Thu 2024-04-11 10:02:24 MDT; 3s ago
   Main PID: 1924 (transmission-da)
     Status: "Idle."
      Tasks: 4 (limit: 2307)
     Memory: 2.1M
        CPU: 28ms
     CGroup: /system.slice/transmission-daemon.service
             └─1924 /usr/bin/transmission-daemon -f --log-level=error

Apr 11 10:02:24 piratebox systemd[1]: Starting transmission-daemon.service - Transmission BitTorrent Daemon...
Apr 11 10:02:24 piratebox systemd[1]: Started transmission-daemon.service - Transmission BitTorrent Daemon.
Apr 11 10:02:25 piratebox transmission-daemon[1924]: [2024-04-11 10:02:25.535] ERR utils.cc:105 Couldn't read '/var/lib/transmission/.config/transmission-dae
0x19@piratebox:~$ sudo systemctl stop transmission-daemon
We need to edit the configuration file before we can begin using the web ui. I like vim but we will use dnf to install ‘nano’ and use that instead.
0x19@piratebox:~$ sudo dnf install nano
0x19@piratebox:~$ sudo nano /var/lib/transmission/.config/transmission-daemon/settings.json
We need to fine the following lines and replace their values. Use Control+w to search. Use the arrow keys to move the cursor and change the variables. Make them look like the following:
"rpc-username": "whateveryouwant",
"rpc-password": "somethingyouremember",
"rpc-whitelist-enabled": false,
"queue-stalled-enabled": false,
When you are done, type Control+x, y, and enter to save the configuration file. Restart the service and check it’s status to make sure our configuration file isn’t broken. We will also run a command to get the server’s IP address because I forget.
0x19@piratebox:~$ sudo systemctl start transmission-daemon
0x19@piratebox:~$ sudo systemctl status transmission-daemon
● transmission-daemon.service - Transmission BitTorrent Daemon
     Loaded: loaded (/usr/lib/systemd/system/transmission-daemon.service; enabled; preset: disabled)
    Drop-In: /usr/lib/systemd/system/service.d
             └─10-timeout-abort.conf
     Active: active (running) since Thu 2024-04-11 10:18:19 MDT; 4s ago
   Main PID: 2188 (transmission-da)
     Status: "Idle."
      Tasks: 4 (limit: 2307)
     Memory: 2.1M
        CPU: 43ms
     CGroup: /system.slice/transmission-daemon.service
             └─2188 /usr/bin/transmission-daemon -f --log-level=error

Apr 11 10:18:19 piratebox systemd[1]: Starting transmission-daemon.service - Transmission BitTorrent Daemon...
Apr 11 10:18:19 piratebox systemd[1]: Started transmission-daemon.service - Transmission BitTorrent Daemon.
0x19@piratebox:~$ hostname -I
192.168.124.81
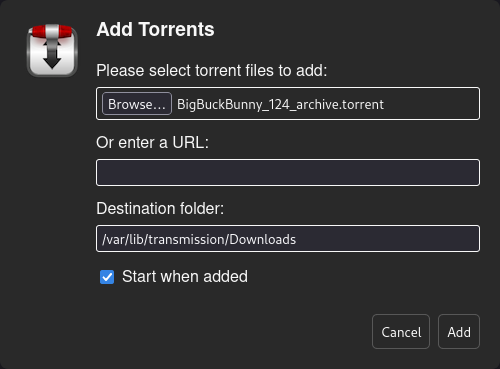
Very everything works by going to http://$IP:9091 in your web browser and log in using the username+password you set in the transmission configuration file. Test that torrenting works by adding a torrent using the web ui. If you don’t see an error it’s all good.

Any changes to the settings you make in the transmission-daemon web ui will persist when the daemon restarts (ie when the machine reboots).
Jellyfin
This process is similar to the above but we don’t have to edit a configuration file. Enable, start, check status. One slightly annoying thing about checking the status of a service (if the output is very long) is that it will capture your terminal. Press q to exit the pager.
0x19@piratebox:~$ sudo systemctl enable jellyfin
Created symlink /etc/systemd/system/multi-user.target.wants/jellyfin.service → /usr/lib/systemd/system/jellyfin.service.
0x19@piratebox:~$ sudo systemctl start jellyfin
0x19@piratebox:~$ sudo systemctl status jellyfin
● jellyfin.service - Jellyfin Media Server
     Loaded: loaded (/usr/lib/systemd/system/jellyfin.service; enabled; preset: disabled)
    Drop-In: /usr/lib/systemd/system/service.d
             └─10-timeout-abort.conf
             /etc/systemd/system/jellyfin.service.d
             └─override.conf
     Active: active (running) since Thu 2024-04-11 10:46:15 MDT; 4s ago
   Main PID: 2698 (jellyfin)
      Tasks: 19 (limit: 2307)
     Memory: 69.3M
        CPU: 4.334s
     CGroup: /system.slice/jellyfin.service
             └─2698 /usr/lib64/jellyfin/jellyfin --webdir=/usr/share/jellyfin-web --restartpath=/usr/libexec/jellyfin/restart.sh

Apr 11 10:46:20 piratebox jellyfin[2698]: [10:46:20] [INF] [6] Emby.Server.Implementations.AppBase.BaseConfigurationManager: Saving system configuration
Apr 11 10:46:20 piratebox jellyfin[2698]: [10:46:20] [INF] [6] Emby.Server.Implementations.AppBase.BaseConfigurationManager: Setting cache path: /var/cache/j>
Apr 11 10:46:20 piratebox jellyfin[2698]: [10:46:20] [INF] [6] Jellyfin.Server.Migrations.MigrationRunner: Migration 'AddDefaultPluginRepository' applied suc>
Apr 11 10:46:20 piratebox jellyfin[2698]: [10:46:20] [INF] [6] Jellyfin.Server.Migrations.MigrationRunner: Applying migration 'ReaddDefaultPluginRepository'
Apr 11 10:46:20 piratebox jellyfin[2698]: [10:46:20] [INF] [6] Jellyfin.Server.Migrations.MigrationRunner: Migration 'ReaddDefaultPluginRepository' applied s>
Apr 11 10:46:20 piratebox jellyfin[2698]: [10:46:20] [INF] [6] Jellyfin.Server.Migrations.MigrationRunner: Applying migration 'AddPeopleQueryIndex'
Apr 11 10:46:20 piratebox jellyfin[2698]: [10:46:20] [INF] [6] Jellyfin.Server.Migrations.Routines.AddPeopleQueryIndex: Creating index idx_TypedBaseItemsUser>
Apr 11 10:46:20 piratebox jellyfin[2698]: [10:46:20] [INF] [6] Jellyfin.Server.Migrations.Routines.AddPeopleQueryIndex: Creating index idx_PeopleNameListOrder
Apr 11 10:46:20 piratebox jellyfin[2698]: [10:46:20] [INF] [6] Jellyfin.Server.Migrations.MigrationRunner: Migration 'AddPeopleQueryIndex' applied successful>
Apr 11 10:46:20 piratebox jellyfin[2698]: [10:46:20] [INF] [6] Main: Kestrel listening on Any IP4 Address
...skipping...q
0x19@piratebox:~$
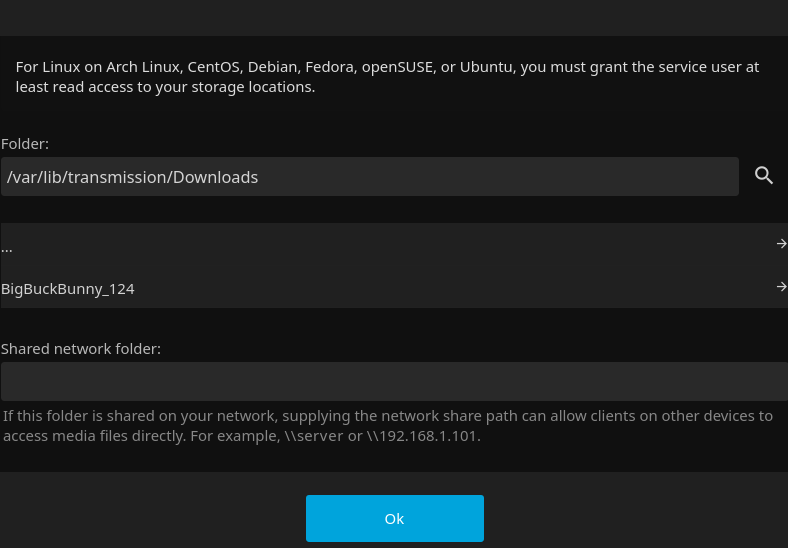
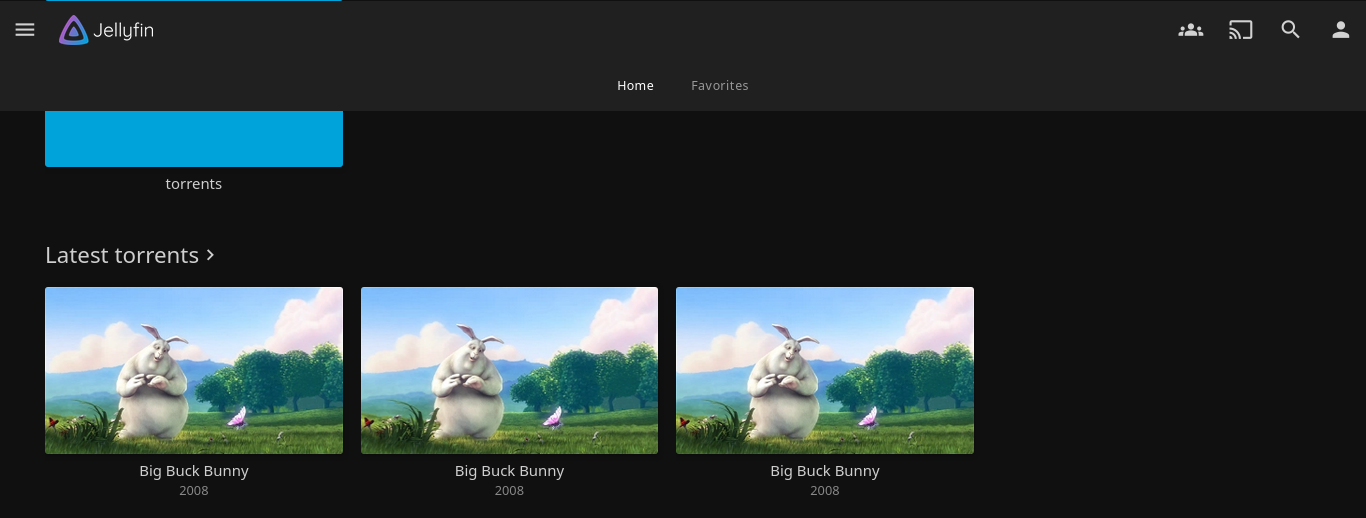
If the service started, go to $IP:8096 in your web browser to get to the jellyfin web ui. Go through the setup menus. When you get to the “Setup Media Libraries” menu, click to add a media library.

Transmission downloads to /var/lib/transmission/Downloads. we will add this as the “torrent” library on jellyfin.
Continue to set up the media library. For a torrent library, be sure to disable automatic medatata updates so that the torrent files will not change and allow you to continue seeding. For a library of DVD rips, you can safely enable automatic metadata updates. Continue through the setup and log in. Peruse the settings tab and admin dashboard to see what jellyfin is capable of. Add more media libraries (ie music, DVD rips) if you have them.
Sharing jellyfin with people who don’t live in your house
This step is purely optional as it adds a unnecessary complexity to the setup.
If you intend to forward ports and allow your friends on other networks to stream from your server, add him as a non-admin user. We will install nginx and set it up to function as a reverse proxy to jellyfin. We need to generate some self-signed SSL certs so that our friends can securely view our media library. They are logging into our system so we need SSL to make sure that their passwords do not get stolen. Openssl will ask a few questions, you could (and should) leave all of them blank. The SSL certificates will expire after 1 year but since you are already clicking through warning messages you probably won't notice. It is a good idea to regenerate your SSL certificates every year.
0x19@piratebox:~$ sudo dnf install nginx
0x19@piratebox:~$ sudo mkdir /etc/ssl/private
0x19@piratebox:~$ sudo mkdir /etc/ssl/certs
0x19@piratebox:~$ sudo openssl req -x509 -nodes -days 365 -newkey rsa:4096  -keyout /etc/ssl/private/nginx.key -out /etc/ssl/certs/nginx.crt
-----
You are about to be asked to enter information that will be incorporated
into your certificate request.
What you are about to enter is what is called a Distinguished Name or a DN.
There are quite a few fields but you can leave some blank
For some fields there will be a default value,
If you enter '.', the field will be left blank.
-----
Country Name (2 letter code) [XX]: ZZ
State or Province Name (full name) []:
Locality Name (eg, city) [Default City]:
Organization Name (eg, company) [Default Company Ltd]:
Organizational Unit Name (eg, section) []:
Common Name (eg, your name or your server's hostname) []:
Email Address []:
0x19@piratebox:~$
Before we start nginx, we need to edit the configuration file.
0x19@piratebox:~$ sudo nano /etc/nginx/nginx.conf
You can (probably) replace the entire nginx.conf with the following block. We are instructing nginx to use our self signed certs. Any requests for http will be redirected to https. Any requests for https will be sent to jellyfin.
# For more information on configuration, see:
#   * Official English Documentation: http://nginx.org/en/docs/
#   * Official Russian Documentation: http://nginx.org/ru/docs/

user nginx;
worker_processes auto;
error_log /var/log/nginx/error.log notice;
pid /run/nginx.pid;

# Load dynamic modules. See /usr/share/doc/nginx/README.dynamic.
include /usr/share/nginx/modules/*.conf;

events {
    worker_connections 1024;
}

http {
    log_format  main  '$remote_addr - $remote_user [$time_local] "$request" '
                      '$status $body_bytes_sent "$http_referer" '
                      '"$http_user_agent" "$http_x_forwarded_for"';

    access_log  /var/log/nginx/access.log  main;

    sendfile            on;
    tcp_nopush          on;
    keepalive_timeout   65;
    types_hash_max_size 4096;

    include             /etc/nginx/mime.types;
    default_type        application/octet-stream;

    # Load modular configuration files from the /etc/nginx/conf.d directory.
    # See http://nginx.org/en/docs/ngx_core_module.html#include
    # for more information.
    include /etc/nginx/conf.d/*.conf;

    server {
        listen       80;
        listen       [::]:80;
        #server_name  _;

        # Load configuration files for the default server block.
        include /etc/nginx/default.d/*.conf;


    return 301 https://$host$request_uri;

    }

# Settings for a TLS enabled server.

    server {
        listen       443 ssl http2;
        listen       [::]:443 ssl http2;
        #server_name  _;
        #root         /usr/share/nginx/html;

    set $jellyfin 127.0.0.1;
    resolver 127.0.0.1 valid=30;

        ssl_certificate "/etc/ssl/certs/nginx.crt";
        ssl_certificate_key "/etc/ssl/private/nginx.key";
        ssl_session_cache shared:SSL:1m;
        ssl_session_timeout  10m;
        ssl_ciphers PROFILE=SYSTEM;
        ssl_prefer_server_ciphers on;

        # Load configuration files for the default server block.
        include /etc/nginx/default.d/*.conf;

    location = / {
        return 302 https://$host/web/;
    }

    location  = /web/ {
             proxy_pass http://$jellyfin:8096/web/index.html;
             proxy_set_header Host $host;
             proxy_set_header X-Real-IP $remote_addr;
             proxy_set_header X-Forwarded-For $proxy_add_x_forwarded_for;
             proxy_set_header X-Forwarded-Proto $scheme;
             proxy_set_header X-Forwarded-Protocol $scheme;
             proxy_set_header X-Forwarded-Host $http_host;
        }


    location / {
        proxy_pass http://127.0.0.1:8096;
        proxy_set_header Host $host;
        proxy_set_header X-Real-IP $remote_addr;
        proxy_set_header X-Forwaded-For $proxy_add_x_forwarded_for;
        proxy_set_header X-Forwarded-Proto $scheme;
        proxy_set_header X-Forwarded-Protocol $scheme;
        proxy_set_header X-Forwarded-Host $http_host;
        proxy_buffering off;
    }

    location /socket {
            proxy_pass http://127.0.0.1:8096;
            proxy_http_version 1.1;
            proxy_set_header Upgrade $http_upgrade;
            proxy_set_header Connection "upgrade";
            proxy_set_header Host $host;
            proxy_set_header X-Real-IP $remote_addr;
            proxy_set_header X-Forwarded-For $proxy_add_x_forwarded_for;
            proxy_set_header X-Forwarded-Proto $scheme;
            proxy_set_header X-Forwarded-Protocol $scheme;
            proxy_set_header X-Forwarded-Host $http_host;
        }
    }

}
The last thing to do is modify selinux policies to allow nginx to talk to the network (in order to talk to jellyfin) then enable and start nginx.
0x19@piratebox:/~$ sudo setsebool -P httpd_can_network_connect 1
0x19@piratebox:/~$ sudo systemctl enable nginx
0x19@piratebox:/~$ sudo systemctl start nginx
Verify that port 80 redirects to 443 and that port 443 gives you jellyfin. You can now set up port forwarding in your router to your server’s IP for ports 80 and 443. Your friends can now access your jellyfin server by visiting your external IP address in a web browser.
Firewall rules
We need to re-enable the system’s firewall and add rules for our services.
0x19@piratebox:~$ sudo systemctl start firewalld
0x19@piratebox:~$ sudo firewall-cmd --permanent --add-service=http
success
0x19@piratebox:~$ sudo firewall-cmd --permanent --add-service=https
success
0x19@piratebox:~$ sudo firewall-cmd --permanent --add-service=jellyfin
success
0x19@piratebox:~$ sudo firewall-cmd --permanent --add-port=51413/tcp
success
0x19@piratebox:~$ sudo firewall-cmd --permanent --add-port=51413/udp
success
0x19@piratebox:~$ sudo firewall-cmd --permanent --add-port=9091/tcp
success
0x19@piratebox:~$ sudo firewall-cmd --permanent --add-port=9091/udp
success
0x19@piratebox:~$ sudo firewall-cmd --reload
success
0x19@piratebox:~$ sudo firewall-cmd --list-ports
9091/tcp 9091/udp
0x19@piratebox:~$ sudo firewall-cmd --list-services
cockpit dhcpv6-client http https jellyfin ssh
0x19@piratebox:~$
now that you are done, reboot the system and verify that everything is starting up correctly and that we can access all of the services.
Routine maintenance
Automatic security updates
We want our system to automatically update every Monday night at midnight. This means less babysitting for us. We will use the cron program to schedule this. Go to Crontab guru if you need help figuring out a different time. Avoid using nonstandard values.
0x19@piratebox:~$ sudo su
[sudo] password for 0x19:
root@piratebox:/home/0x19# EDITOR="nano" crontab -e
no crontab for root - using an empty one
crontab: installing new crontab
When the editor opens, type the following, save, and quit.
0 0 * * 1 dnf update -y; wait; reboot;
Now check if the crontab actually installed (it should say the same thing as you typed)
root@piratebox:/home/0x19# crontab -l
0 0 * * 1	dnf update -y; wait; reboot;
root@piratebox:/home/0x19# exit
exit
0x19@piratebox:~$
Security updates are not optional. Anything on the open internet should be updated regularly. You should be doing all of your security updates.
Major version upgrades
Every 6 months fedora releases a new major version. You should always upgrade to the next major version within a year so your system will get important security patches. Refer to Upgrading Fedora using DNF system plugin on the fedora documentation page for instructions. Major version upgrades are not automatic and you should watch the output to make sure everything goes smoothly. Do not take the commands from the fedora docs and place them into a crontab if you want your piratebox to be reliable and functional.
Major version upgrades are not optional. Each Fedora version stops receiving all updates N+2 versions after version N releases (about a year and a half). Anything on the open internet should be running an operating system that still receive security patches (that you need to be applying). You should be doing all of your major version upgrades.
Check disk capacity and health
I like to check disks when I am doing major version upgrades. You can check free space in cockpit or by running the following command:
0x19@piratebox:~$ df -h
Filesystem      Size  Used Avail Use% Mounted on
/dev/sda3        29G  3.8G   26G  13% /
devtmpfs        4.0M     0  4.0M   0% /dev
tmpfs           982M  8.0K  982M   1% /dev/shm
tmpfs           393M  1.2M  392M   1% /run
tmpfs           982M     0  982M   0% /tmp
/dev/sda2       960M  284M  677M  30% /boot
tmpfs           197M   12K  197M   1% /run/user/1000
We should also check to see if our drives are failing using the smartctl command. If a test fails or you see failure messages, it’s time to replace the drive. The lsblk program will list all of our drives in a friendly table format. In my case, sda is the actual drive. sda1 through sda3 are the partitions on that drive. Do smart checks for every disk reported by lsblk.
0x19@piratebox:~$ sudo dnf install smartmontools
0x19@piratebox:~$ lsblk
NAME   MAJ:MIN RM  SIZE RO TYPE MOUNTPOINTS
sr0     11:0    1 1024M  0 rom
zram0  251:0    0  1.9G  0 disk [SWAP]
sda    252:0    0   30G  0 disk
├─sda1 252:1    0    1M  0 part
├─sda2 252:2    0    1G  0 part /boot
└─sda3 252:3    0   29G  0 part /
0x19@piratebox:~$ sudo smartctl -t short /dev/sda
smartctl 7.4 2023-08-01 r5530 [x86_64-linux-6.7.5-200.fc39.x86_64] (local build)
Copyright (C) 2002-23, Bruce Allen, Christian Franke, www.smartmontools.org

Self-test has begun
Use smartctl -X to abort test

0x19@piratebox:~$ sudo smartctl -l selftest /dev/sda
smartctl 7.4 2023-08-01 r5530 [x86_64-linux-6.7.5-200.fc39.x86_64] (local build)
Copyright (C) 2002-23, Bruce Allen, Christian Franke, www.smartmontools.org

=== START OF SMART DATA SECTION ===
Self-test Log
Self-test status: No self-test in progress
Num  Test_Description  Status                       Power_on_Hours  Failing_LBA  NSID Seg SCT Code
 0   Short             Completed without error                 800            -     -   -   -    -
 1   Short             Completed without error                 800            -     -   -   -    -
 2   Short             Completed without error                 800            -     -   -   -    -

0x19@piratebox:~$ sudo smartctl -H  /dev/sda
smartctl 7.4 2023-08-01 r5530 [x86_64-linux-6.7.5-200.fc39.x86_64] (local build)
Copyright (C) 2002-23, Bruce Allen, Christian Franke, www.smartmontools.org

=== START OF SMART DATA SECTION ===
SMART overall-health self-assessment test result: PASSED
Make it even better
Building the above setup on a system with zfs (so we can have data redundancy) or with mirrored linux logical volumes would help protect our stolen media collection from certain types of hard drive failure. Doing backups of the media library onto an offline drive would also be a good idea if you have something rare in your collection.
Adding nfs or samba to upload dvd rips is another idea but since the system already has ssh running, you can just use ssh (specifically sshfs and scp) to copy files around. (hint: all the linux graphical file managers have ssh integration. Why are you not using desktop linux already?)
Downolad/sideload one of the jellyfin client apps to your desktop, phone, and pukes smart tv.
probably more but I am done with this nonsense because ssh exists :)
 Monero:
  Bitcoin:
  http://ilsstfnqt4vpykd2bqc7ntxf2tqupqzi6d5zmk767qtingw2vp2hawyd.onion:8080
 http://xzh77mcyknkkghfqpwgzosukbshxq3nwwe2cg3dtla7oqoaqknia.b32.i2p:9090
  |
|